
How to connect Canon PIXMA printer to WiFi for the first time? A few days ago, one of the readers asked the same question, so I answered it in this post. Newbies commonly ask the question, and I know how intimidating it can be when they are trying to set up their printer for the first time. But, no worries. I am here to help you.
Whether you want to work on your school projects, print photos, or just need to finish something quickly, connecting your printer to WiFi makes everything easy. You won’t have to deal with messy cables anymore!
In this blog, I will walk you through each step of the process. Follow along, and you can print from your computer without any hassles. Let’s start connecting your Canon PIXMA printer to your WiFi network, and soon, you will be printing out your favorite projects in no time!
Necessary Requirements
The following are the requirements that you will need to ensure before moving to learn ‘how to connect Canon PIXMA printer to WiFi‘. Let’s take a look at the below points:
- Ensure the printer is powered on and functioning: Check that your printer is turned on. It should also work properly. Look for error lights and listen for sounds that indicate it’s ready to print.
- Check WiFi network availability and password: Confirm whetheryour WiFi is working. Ensure you are connected to the right network and have the correct password to access it.
- Compatibility of the Canon PIXMA model with WiFi connection: Finally, confirm that your specific Canon PIXMA printer model can connect to WiFi. Not all printers have this feature, so check the model’s details.
How to Connect Canon PIXMA Printer to WiFi?
You will need a Canon printer and a WiFi network to make a connection between your Canon printer and the wireless WiFi network. I have broken down the steps for you; just follow them individually to make it easier.
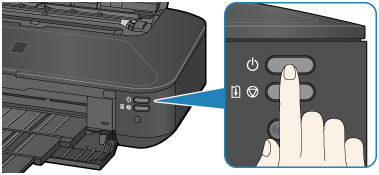
- To turn on your Canon printer, press the Power button.
- Next, look for the Settings option on the printer’s control panel.
- Then, use the arrow buttons to go to Device Settings.
- After that, find the LAN Settings option.
- Press the OK button.
- Afterward, use the navigation button to select the Wireless LAN setup option.
- Hit the OK button and wait until your printer searches for the available WiFi printer.
- When the process is going on, you will find the printer’s light glowing.
Many people had trouble with their printers, and finding the WiFi network took a long time. To solve this problem, follow these steps:
- Press the Stop button on the printer.
- Then, you will see options like Wireless LAN setup and Standard setup.
- Afterward, choose OK to continue.
- Next, go to the WiFi network option and press OK again to confirm.
- Now, type in your WiFi password and hit OK.
- Finally, when it says “Connected,” press the OK button to finish.
Above, I have shown you how to connect Canon PIXMA printer to WiFi in easy steps. These steps work for Mac and Windows computers, focusing on connecting your printer to WiFi.
How to Add Canon PIXMA Printer on Windows PC?
Now that you have connected your printer to WiFi network, it’s time to add your printer to a Windows PC. I have simplified the steps below. Follow them one at a time to add your printer:
- Press the Windows + R keys on your keyboard to open the Run box.
- Copy this command: control/name Microsoft.DevicesAndPrinters, and paste it into the Run box.
- Click the OK button.
- This will take you to the Devices and Printers window.
- Look for the Add a printer option and click on it.
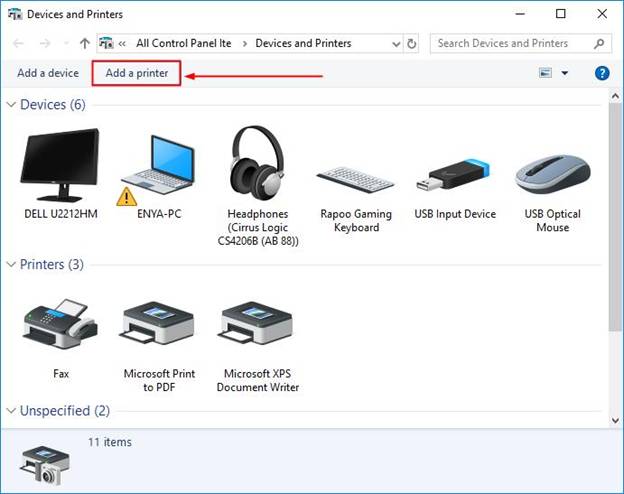
- Follow the steps that you see on the screen to finish adding your printer.
And that’s it! You are done.
How to Add Canon PIXMA Printer on MacBook?
If you want to add your Canon printer to your MacBook, this part is for you. First, ensure you are connected to your WiFi network (as explained above). After that, follow the steps below:
- Plug your Mac into a power source and turn on your Canon printer.
- Next, follow the steps in the first part of this blog to connect your Canon printer.
- Then, go to Canon’s website to download the printer driver.
- Tap on the Apple logo given in the upper-left corner of your screen.
- Select System Preferences from the menu.
- On the next window, select the Printers & Scanners.
- Click the “+” icon to add your Canon printer to your Mac.
- Choose your Canon PIXMA printer from the list.
- Then, click the Add button.
Conclusion
Finally, I have explained ‘how to connect Canon PIXMA printer to WiFi‘, a simple process that makes printing easier and more convenient. Just make sure, your printer is on, your WiFi is working, and your printer model can connect to WiFi. Once you set it up, you can enjoy printing from your computer without any wires getting in the way. Follow the steps for adding your printer on Windows or Mac; you will be ready to print without any problem!